What You'll Have at the End
In about five minutes you'll have a live event with a single QR code that lets guests check in, find their seat, share photos, and sign the guestbook. No design skills, no setup fee. Let's walk through it.
Step 1: Create the Event
From your dashboard, hit Create Event. The setup is three short steps, and step one is just the basics: what kind of event it is, its name, and the date.
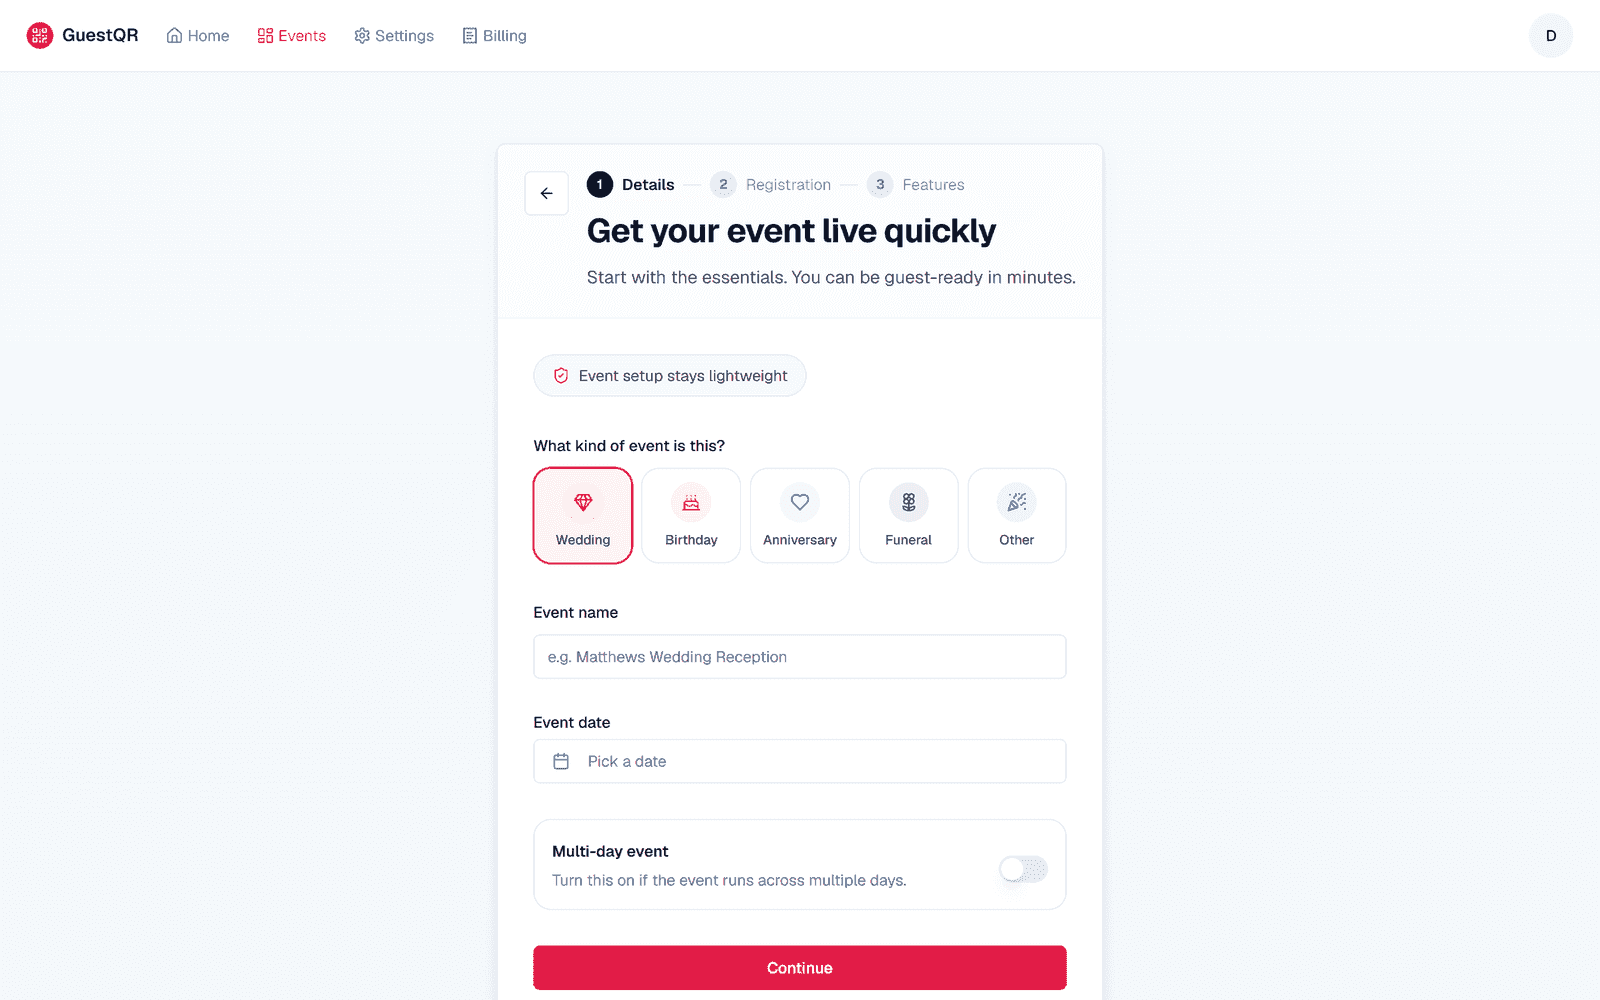
Pick the type that fits — wedding, birthday, anniversary, funeral, or other. It tailors a few defaults; you can change everything later.
Step 2: Choose How Guests Get In
Step two asks how guests get in. Check-in is optional, so there are three doors:
- Just share — guests scan and go straight to the photos. No names, no queue. Best for parties and casual events.
- Register at the door — guests type their name once, so you know who's here. Best for walk-in parties and open houses.
- Guest list — you add the names and (optionally) table assignments. Guests find their name to check in and see their table. Best for weddings and seated dinners.
You can change the door any time, even during the event.
Step 3: Turn On Features
Step three is the menu of guest-facing features: the shared photo gallery, the live wall, and the guestbook. Switch on what this event needs and leave the rest off — guests only ever see what you enable.
That's the wizard. Your event is live the moment it's created — there's no draft mode and no publish button. Until the day itself it's in rehearsal, so you can set up and test freely. GuestQR then walks you through a short setup (make it yours, see it work, choose your plan, and you're all set); the steps below cover the same ground, and you can come back to any of them later.
Step 4: Make It Yours in Customize
Open Customize (from your event's overview, or Settings → Guest experience) to give the event personality. This is where a generic event becomes your event.
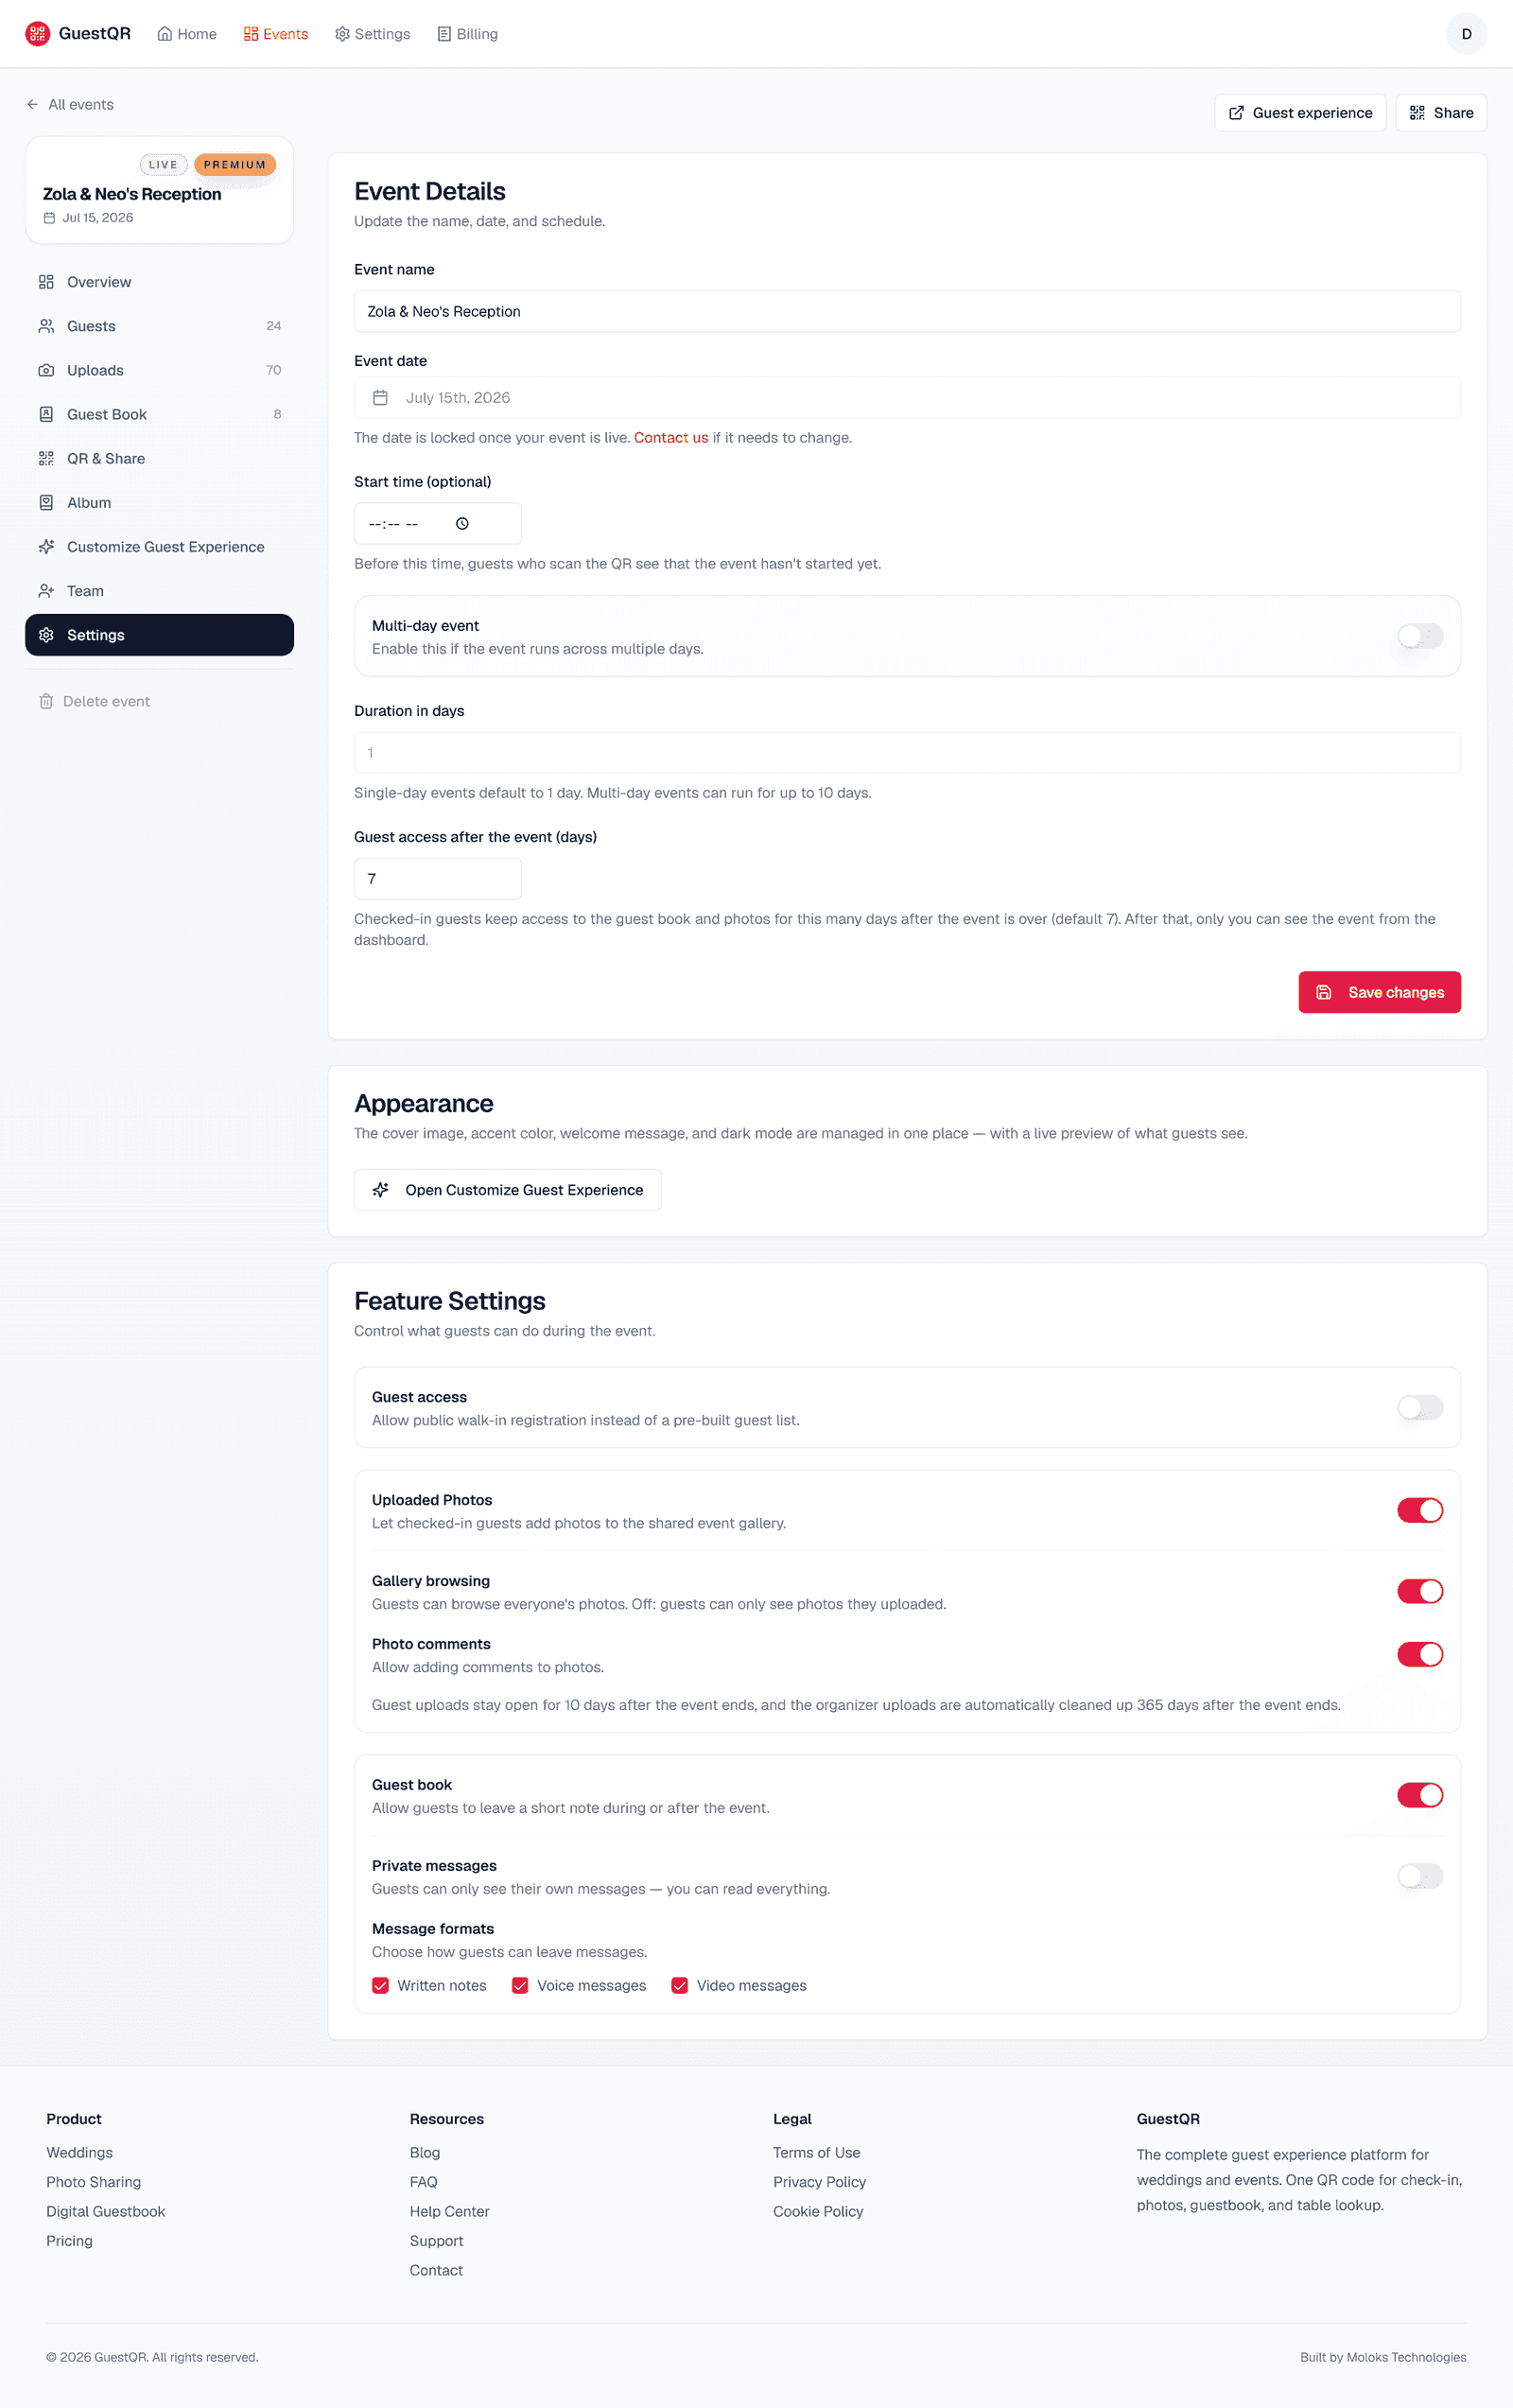
Worth setting before guests arrive:
- Host names and a short welcome message — these greet guests on the welcome screen.
- An accent color to match your palette.
- A cover image for a photo-led welcome.
- Feature toggles — photos, comments, live wall, guestbook.
Step 5: Get Your QR Code
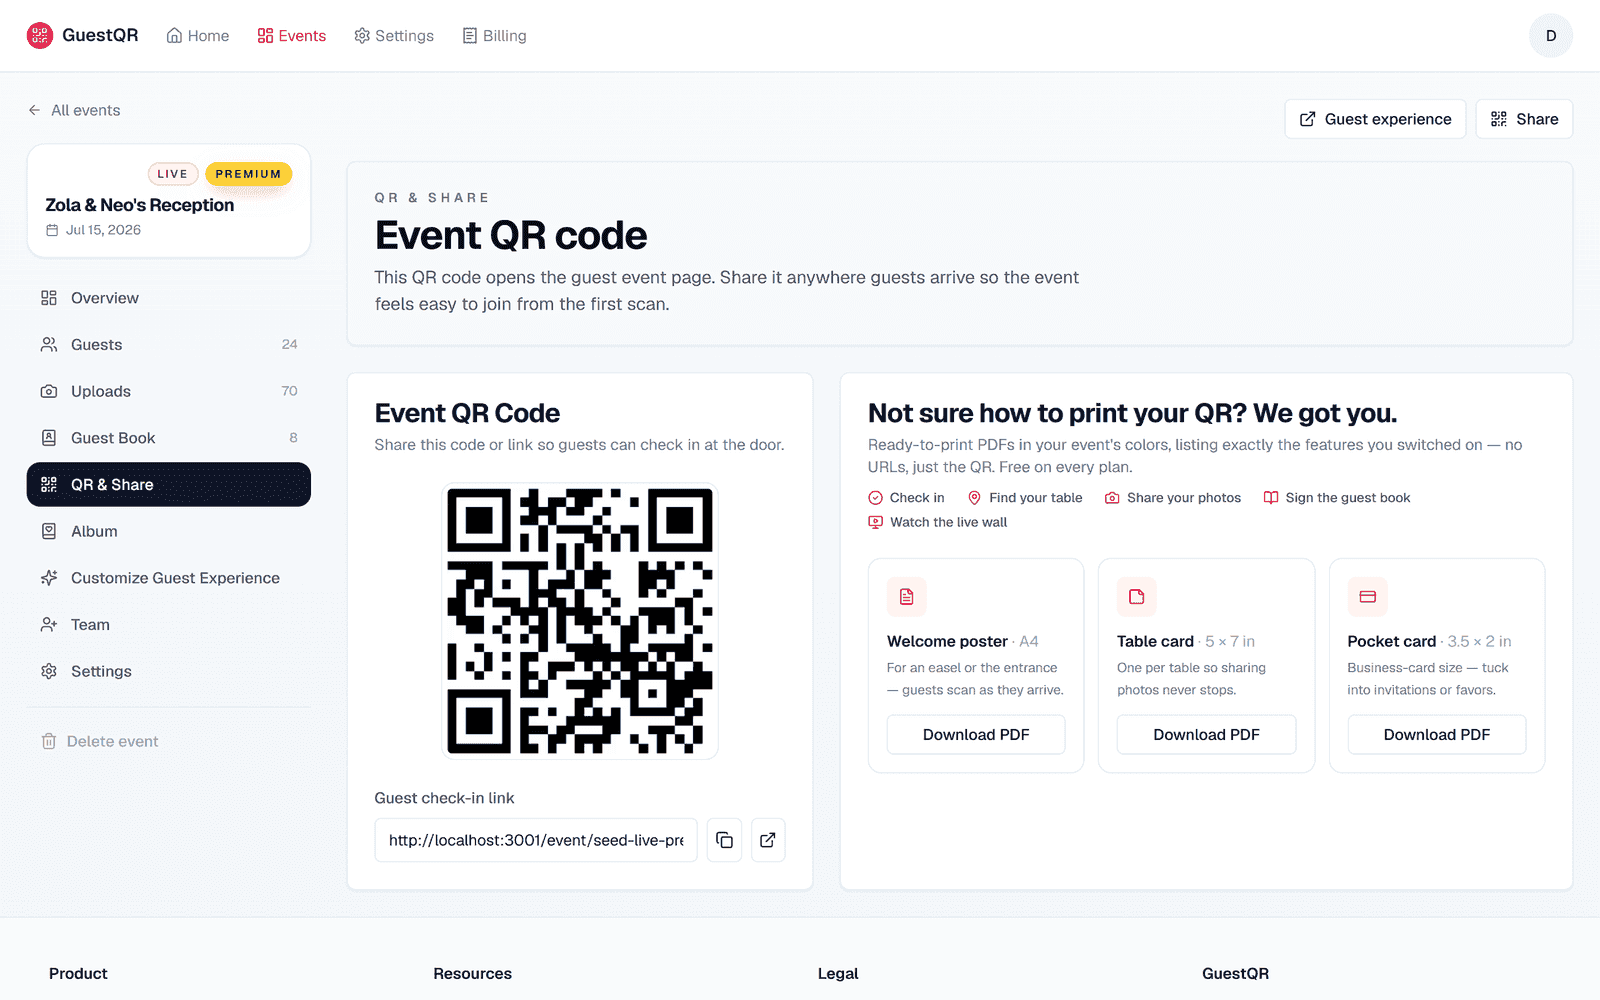
Head to QR & Share. This is the code that carries the whole event. Share it digitally, or turn it into printed table cards in a couple of clicks.
Step 6: Test It as a Guest
This is the step people skip and shouldn't. Because the event is in rehearsal until the day itself, you can scan your own QR code (or open the guest link) and walk the entire experience yourself before anyone arrives.
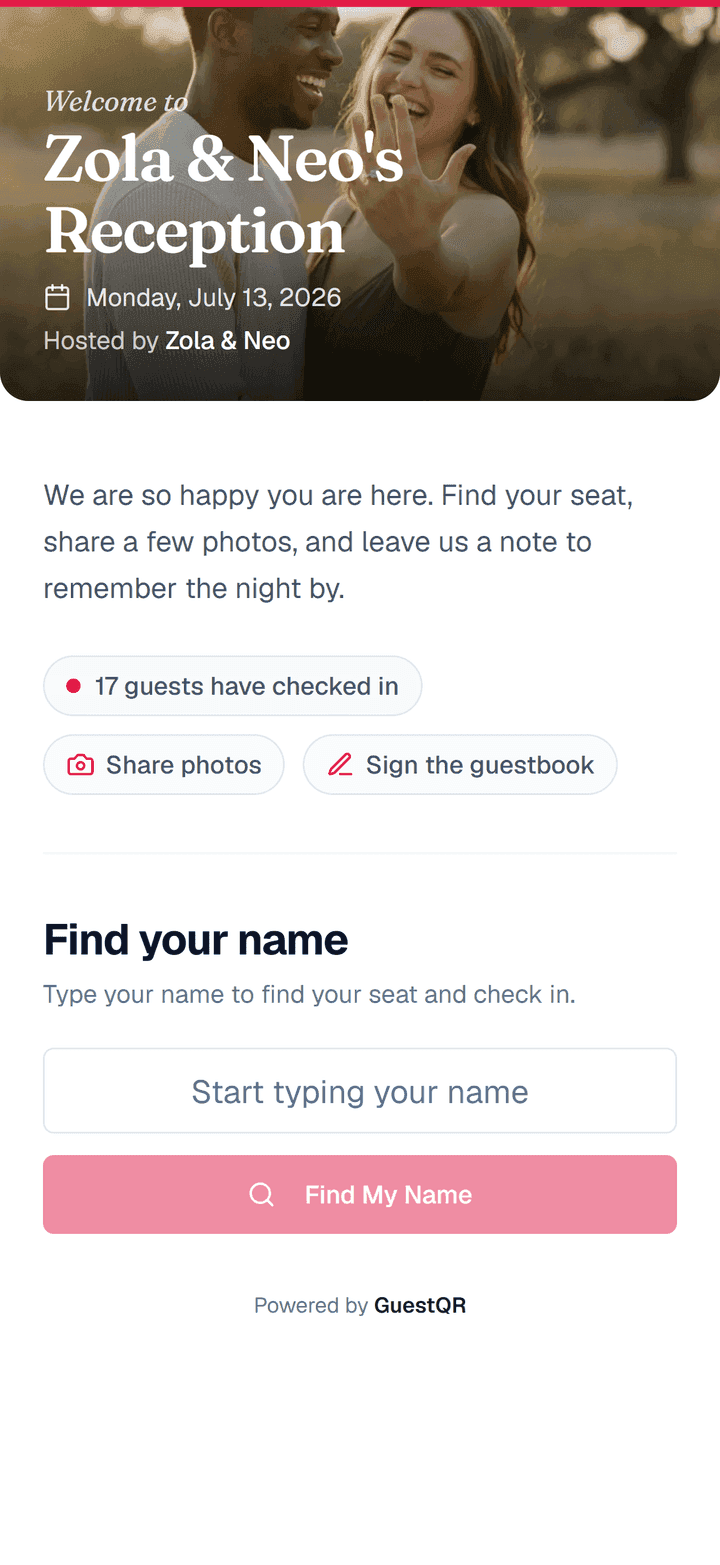
Check in as a test guest, upload a photo, leave a guestbook note. If it all feels right, clear what you made with Settings → Rehearsal & data → Reset test content, and you're ready.
Step 7: Add Your Guests and Share
There's no go-live step — your event has been live since you created it, and the QR code you tested is the one guests will scan. If you chose the Guest list door, add your guests (by hand or CSV import). Then share the code.
Create your first event now
Three steps to set up, a rehearsal to test on your own phone, and one QR code to run the whole evening. Free to start with unlimited guests.
Frequently Asked Questions
Can I change settings after creating the event?
Yes. The event type, features, names, and colors can all change at any time. The date can move freely until the day arrives or real guests have used the event.
Is there a draft mode?
No — your event is live from the moment you create it. Until the day itself it's in rehearsal: you can scan your own code and use every feature exactly as a guest would, then clear the test content (Settings → Rehearsal & data) before real guests arrive.
Does my QR code ever change?
No. The QR code is created with the event and stays the same. You can print it during setup and it will work on the day.