
Don't Type 200 Names by Hand
If your guest list already lives in a spreadsheet — and it almost always does — there's no reason to retype it. GuestQR imports the whole thing from a CSV in one step, table assignments included. Here's exactly how.
Step 1: Open the Guest List
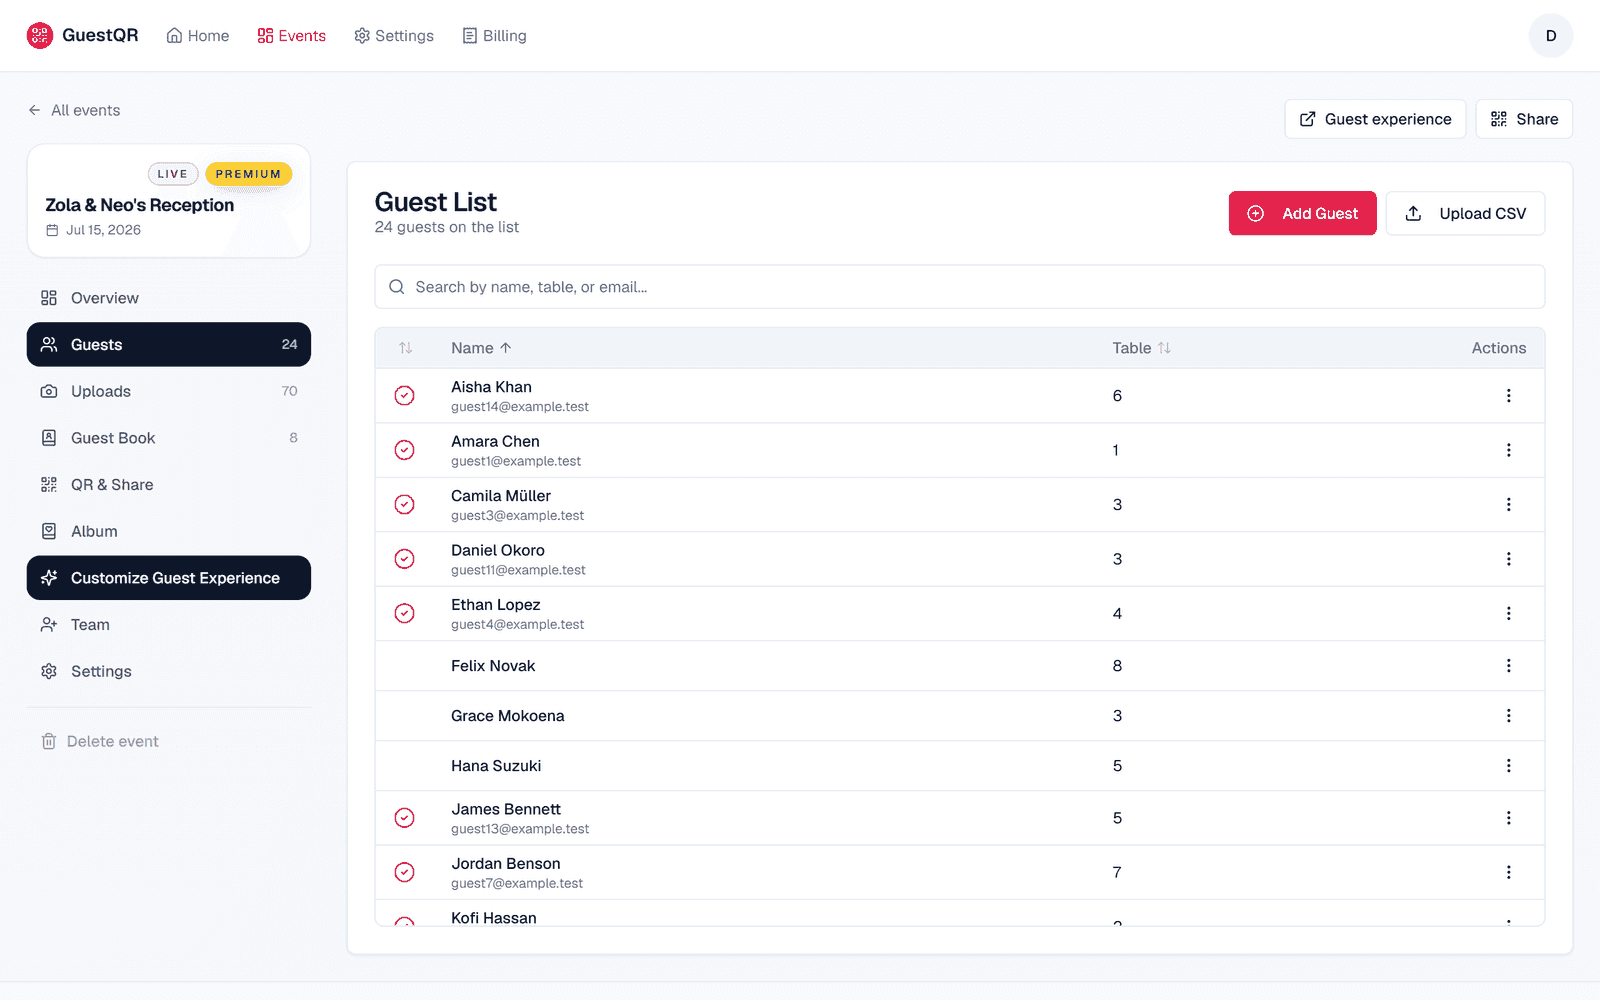
Inside your event, go to Guests. With the event's door set to Guest list (you can switch it in the Customize studio), you'll see the guest list with two import options up top: Add Guest for one-offs and Upload CSV for the whole list.
Step 2: Get the Template
Click Upload CSV and download the template. It's deliberately simple — just two columns:
Name,Table
Jane Doe,1
John Doe,1
Priya Sharma,Head Table
A few rules worth knowing:
- Name is required. Table is optional — leave it blank for open seating.
- The Table value is whatever you want guests to see: a number like
6, or a label likeHead Table. Keep it short; the guest screen already says "Table" where it needs to. - Duplicate rows are skipped automatically, so re-importing an updated list is safe.
Step 3: Fill It In
Open the template in Excel, Google Sheets, or Numbers and paste your list into the two columns. If your existing spreadsheet has extra columns (emails, meal choices, RSVPs), just copy the names and tables across — GuestQR only needs those two.
Tip: To assign tables fast, sort your spreadsheet by table and fill the Table column in blocks. It's much quicker than going name by name.
Step 4: Upload
Back in the Upload CSV dialog, select your file and import. GuestQR parses the rows, skips duplicates, and adds everyone to the list. You'll see a summary of how many were added.
Step 5: Verify the Guest Experience
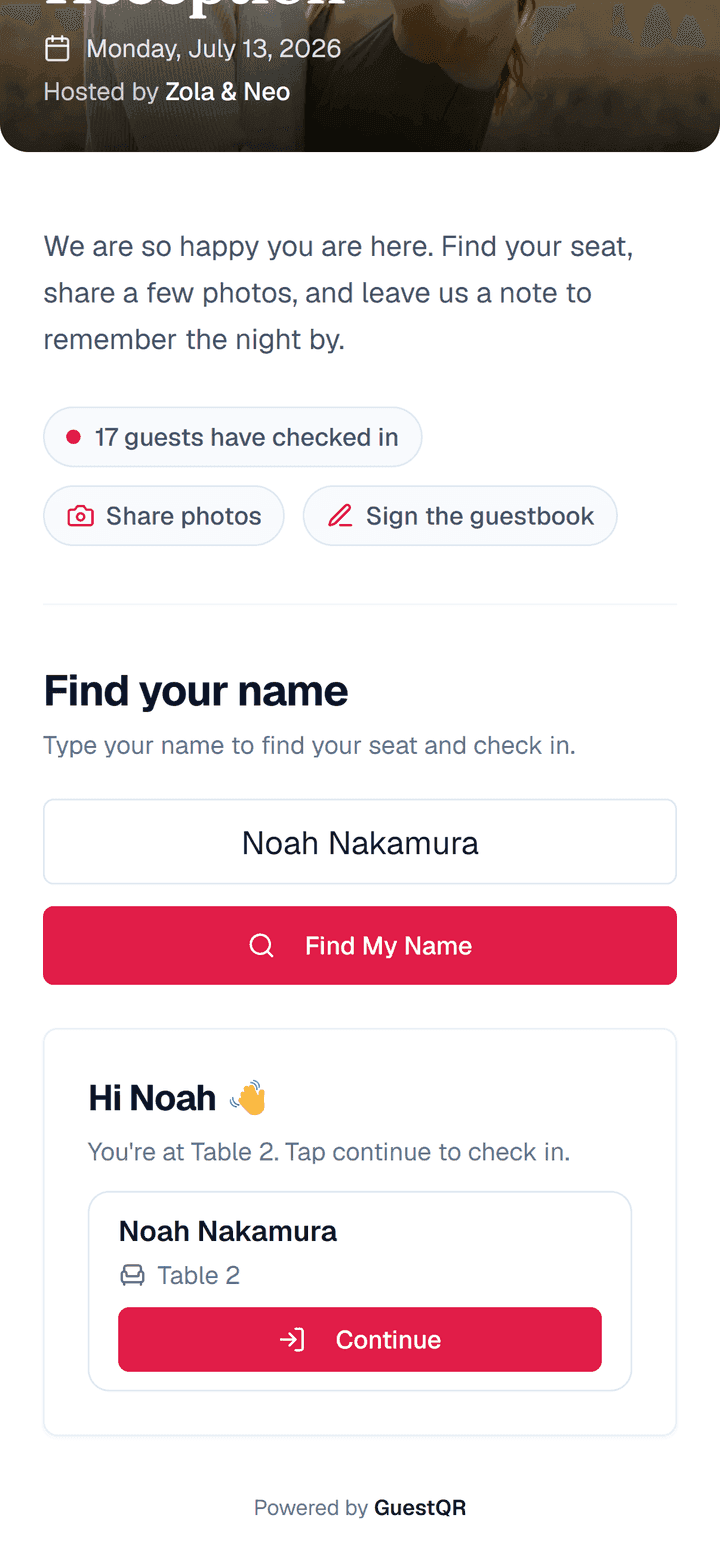
The payoff: once names and tables are imported, table lookup works instantly. A guest types their name and sees their table — no extra setup.
Editing After Import
Nothing is locked. After importing you can:
- Add stragglers with Add Guest.
- Edit any name or table from the row menu.
- Reassign tables — the guest-facing lookup updates instantly, no reprint of the digital chart.
- Re-upload an updated CSV; duplicates are skipped so only new guests are added.
A Note on Limits
Check-in and table lookup are free with unlimited guests — import a list of 40 or 400 and the process is identical.
Import your guest list in one step
Upload a Name/Table CSV and GuestQR builds your searchable guest list — with table assignments — automatically. Free to start with unlimited guests.
Frequently Asked Questions
What columns does the CSV need?
Just two: Name and Table. Name is required; Table is optional (leave it blank for open seating). Download the template so the headers are exactly right.
What happens to duplicates?
They're skipped automatically. You can safely re-import an updated list and only new guests will be added.
Can I import without table assignments?
Yes. Leave the Table column blank and you'll have a checked-in guest list without seating — useful for open or standing events.